

The digital age has made video creation accessible to almost anyone with a smartphone, computer, or camera. As a result, we find ourselves with an abundance of video footage that we want to share with family, friends, or a broader audience. Whether you’re a professional videographer or someone who simply enjoys capturing moments, there comes a time when you’ll need to trim your videos. Trimming helps to eliminate unnecessary sections, making the video more concise, engaging, and fit for its intended purpose. In this article, we will explore four methods to trim a video to perfection.
1. Built-in Video Editing on Smartphones

Most modern smartphones come equipped with built-in video editing capabilities, making it easy to trim a video right after you shoot it. Here’s a general guide on how to do it:
iOS Devices:
- Open Photos App: Navigate to the Photos app and select the video you wish to trim.
- Tap Edit: Located usually at the top-right corner, tap the “Edit” button.
- Trimming Interface: A timeline of the video appears at the bottom of the screen. Drag the yellow handles at the ends of the timeline to select the part you want to keep.
- Preview and Save: Tap “Play” to preview the trimmed video. If you’re satisfied, tap “Done” and choose “Save as New Clip” or overwrite the original.
Android Devices:
- Open Gallery: Go to your Gallery or Photos app and choose the video to trim.
- Select Edit: Usually represented by a pencil icon or the word ‘Edit’.
- Trim: Drag the blue or white handles on either side of the timeline to trim.
- Save: Once you’re happy with your selection, tap “Save” or “Done”.
The convenience of smartphone-based trimming is unbeatable, especially for quick edits on-the-go.
2. Desktop Software for More Control
If you want more control over your video editing, desktop software options offer advanced features. Here are two popular ones:
Adobe Premiere Pro
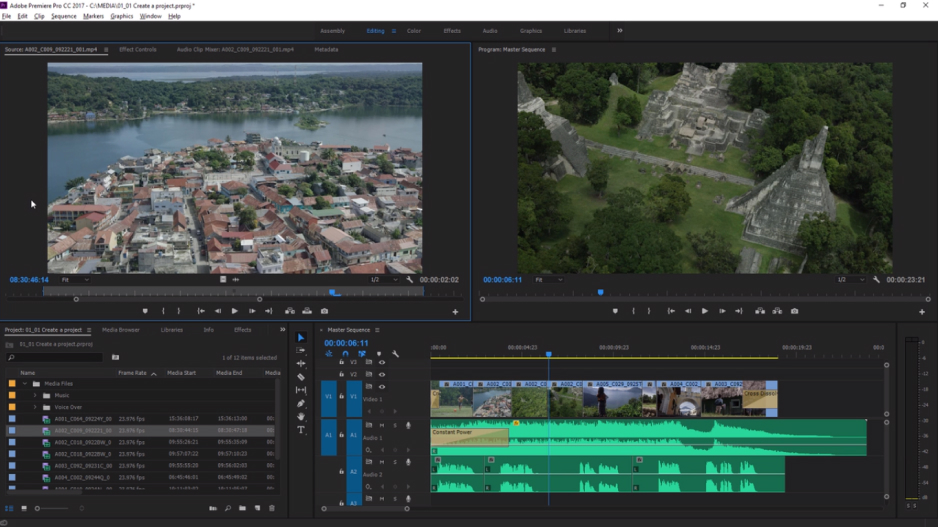
Adobe Premiere Pro stands as a top-tier video editing solution within the Adobe Creative Cloud lineup. Celebrated for its robust functionality and adaptability, Premiere Pro empowers both seasoned professionals and avid hobbyists to craft cinema-quality movies, television episodes, and diverse video content. Equipped with an easy-to-navigate interface, an extensive suite of editing resources, and superior color grading and sound editing features, this software remains a preferred choice for numerous directors, editors, and digital storytellers. From intricate documentaries to brief films or even casual vlogs, Adobe Premiere Pro provides the means and adaptability for crafting compelling visual narratives.
- Import Video: Open Adobe Premiere Pro and import your video into the project.
- Timeline: Drag your video onto the timeline.
- Razor Tool: Select the “Razor Tool” or press ‘C’ on your keyboard, then click where you want to make a cut.
- Select and Delete: Use the “Selection Tool” (‘V’ on the keyboard) to select the portion to remove, then hit the ‘Delete’ key.
- Export: Go to “File” -> “Export” -> “Media” to save the trimmed video.
Windows Photos App
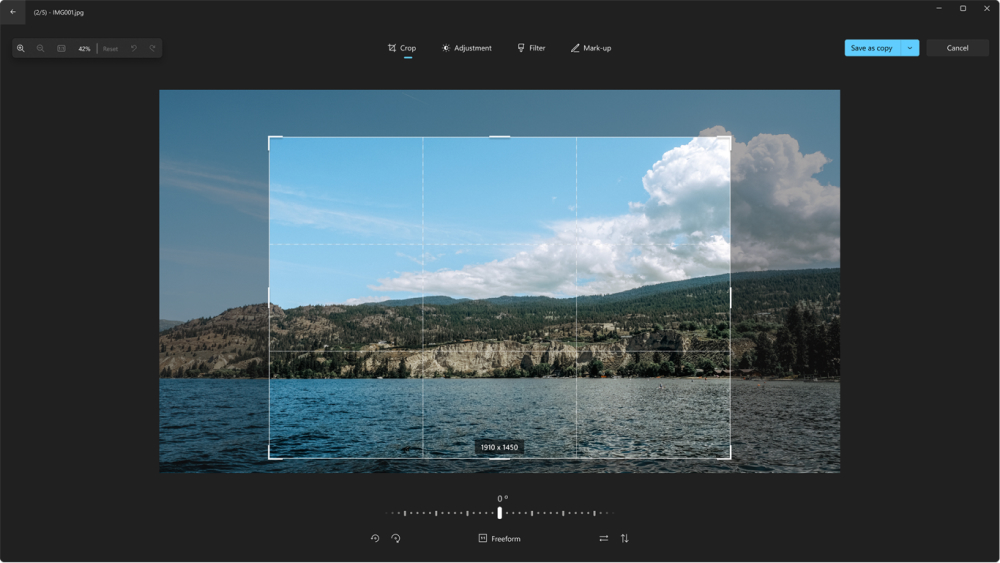
The Windows Photos App is a pre-installed application on Windows devices, designed for viewing, organizing, and editing photos and videos. With a user-friendly interface, this app offers basic editing tools suitable for everyday photo and video enhancements. While it may not boast the advanced features of dedicated editing software, it provides a convenient and straightforward way for users to crop, filter, trim, and make simple adjustments to their media. Ideal for beginners or those looking to make quick edits, the Windows Photos App is a handy tool for personal media management.
- Import: Open the software and import your video.
- Trim Tool: Usually represented by a pair of scissors, click this tool and drag the handles to trim.
- Save: After trimming, save your video by clicking the “Save” or “Export” button.
Desktop software provides more control but usually comes with a learning curve and sometimes a hefty price tag.
3. Online Tools for Quick Edits
If you’re looking for a middle-ground between smartphone and desktop software, online tools can be an excellent option. Websites like Kapwing, Clideo, or Adobe Spark allow for basic video trimming with a straightforward interface.
- Upload Video: Visit the website and look for an option to upload or drag-and-drop your video.
- Trimming Interface: Once uploaded, you’ll see a timeline similar to those in more advanced software. Drag to trim.
- Export: After trimming, download your video, usually by clicking an “Export” or “Download” button.
The advantage of online tools is that they require no downloads or subscriptions, although you may need to sign up for a free account.
4. Command-Line Tools for the Tech-Savvy

For those comfortable with command-line interfaces, tools like FFmpeg offer a quick, customizable way to trim videos.
- Download FFmpeg: Visit the FFmpeg website and download the appropriate version for your system.
- Open Command-Line: Open your command-line interface (Terminal, Command Prompt, etc.).
- Navigate to Video: Use the cd command to navigate to the directory containing your video.
- Execute Command: Use a command like ffmpeg -ss [start time] -i input.mp4 -to [end time] -c copy output.mp4 to trim your video.
This method provides a lot of control and is incredibly fast but requires a level of technical expertise.
Which Trimming Option to Choose
Choosing a video trimming option depends on your needs, level of expertise, and the intended purpose of the video. Here’s a guide to help you decide:
Skill Level and Needs:
Beginners / Casual Users: If you’re new to video editing or you just need to make quick trims without much customization:
- Smartphone built-in video editing: If you’ve captured the video on your phone, this is the most straightforward option. It’s quick and convenient.
- Windows Photos App: For Windows users, this offers an easy way to trim videos without downloading extra software.
- Online Tools: If you’re looking for something browser-based without software installation, online trimming tools can be helpful.
Intermediate Users: If you’re familiar with video editing basics but don’t need professional-grade tools:
- Online Tools: Websites with enhanced trimming capabilities can offer additional features like transitions, effects, and text overlay.
- Basic Desktop Software: Programs like iMovie (for Mac) or simpler paid software options provide more advanced features without the complexity of professional tools.
Advanced / Professional Users: If you need robust editing tools, fine-tuned trimming, and advanced video editing features:
- Adobe Premiere Pro: This is a top choice for many professionals. It offers a vast array of tools and the flexibility to create high-quality edits.
- Command-Line Tools: If you’re technically proficient, tools like FFmpeg can be incredibly fast and customizable.
Intended Video Purpose:
- Personal / Social Media Sharing: For videos meant for personal viewing or sharing on platforms like Instagram or Facebook: Built-in smartphone tools, online editors, or the Windows Photos App would suffice.
- Professional Presentation / Broadcasting: For content intended for professional platforms, YouTube, TV, or film: Tools like Adobe Premiere Pro are essential for producing polished, professional videos.
- Bulk or Batch Trimming: If you have multiple videos that need trimming at specific intervals, command-Line Tools such as FFmpeg can automate this process and save time.
Time and Resource Constraints:
- Quick Edits: For fast trims or when you’re on the go, smartphone tools or online editors are ideal.
- In-depth Edits: For projects where you can invest time in detailed editing, desktop software would be more suitable.
Budget:
- Free or Low-cost: Built-in smartphone editors, Windows Photos App, and many online tools are free. However, for more advanced features, some online platforms might require payment.
- Investment: Adobe Premiere Pro and similar advanced software require a subscription or one-time purchase, representing an investment in your editing capabilities.
Conclusion
Trimming a video doesn’t have to be a cumbersome task. Whether you are a casual user looking for quick edits or a professional seeking precision and control, there is a method out there to suit your needs. From the built-in editors on smartphones to professional desktop software, online tools, and even command-line options, video trimming has never been more accessible. Choose the one that fits your requirements and skill level, and make your videos as engaging as they can be.
FAQ
1. Is the quality of my video compromised when using online trimming tools?
While many online tools strive to maintain the original video quality, some might compress the video slightly for faster processing and downloading. Always check the output settings or choose a higher resolution if available. If maintaining the utmost quality is crucial, consider using professional desktop software.
- Are there any free alternatives to Adobe Premiere Pro for advanced video trimming?
Yes, there are several free alternatives for advanced video editing. Programs like DaVinci Resolve and Shotcut are powerful and free to use, though they may have a steeper learning curve.
- I’ve trimmed a video on my smartphone; can I undo the trim if I’m not satisfied?
On most smartphones, when you trim a video and save, you’re often given an option to save it as a new clip, leaving the original untouched. If you’ve overwritten the original, it might not be possible to undo the trim. Always backup or opt to save as a new clip to preserve the original.
- Do command-line tools like FFmpeg work on all operating systems?
Yes, FFmpeg is a cross-platform tool and can be used on Windows, macOS, and Linux. However, the installation and usage might vary slightly across different OS.
- How do I ensure that the trimmed video maintains the same format and codec?
When using desktop software like Adobe Premiere Pro, you’ll often be presented with export settings, where you can choose the desired format and codec. With online tools, some might automatically match the original video’s format, while others allow you to choose. Using FFmpeg with the ‘-c copy’ command ensures the codec remains unchanged. Always check the tool’s output options to ensure consistency.

David’s journey in the tech world began as a system administrator and he has since transitioned to a new IT role in a different company. Over the years, his extensive knowledge and practical experience have made him a trusted go-to resource for friends and acquaintances seeking help with computer-related issues. Recognizing the value of his accumulated knowledge, David transformed his initial idea of a personal blog into a platform aimed at helping others.
He takes pride in crafting detailed and user-friendly articles and guides, ensuring that even novice computer users can benefit from his insights.
Send your message for David here and learn more about him.