
Are you ready to bring your screen recordings to life? Screen recording software is the ultimate tool for capturing your computer screen and creating compelling videos. Whether you’re a content creator, educator, or business professional, screen recording software can help you communicate your ideas effectively and engage your audience. In this step-by-step guide, we’ll explore the world of screen recording software and show you how to use Movavi Screen Recorder, a top-notch tool that will take your video creation skills to new heights.
Why Use Screen Capture Software?

Before we jump into the nitty-gritty of Movavi Screen Recorder, let’s explore the benefits of using screen capture software. Have you ever struggled to explain a complex process or showcase a software tutorial to someone? Screen capture software allows you to record your screen activity, making it easy to demonstrate and share information with others visually. Whether you want to create instructional videos, record your gameplay, or even capture video calls, screen capture software opens up a world of possibilities.
Introducing Movavi Screen Recorder
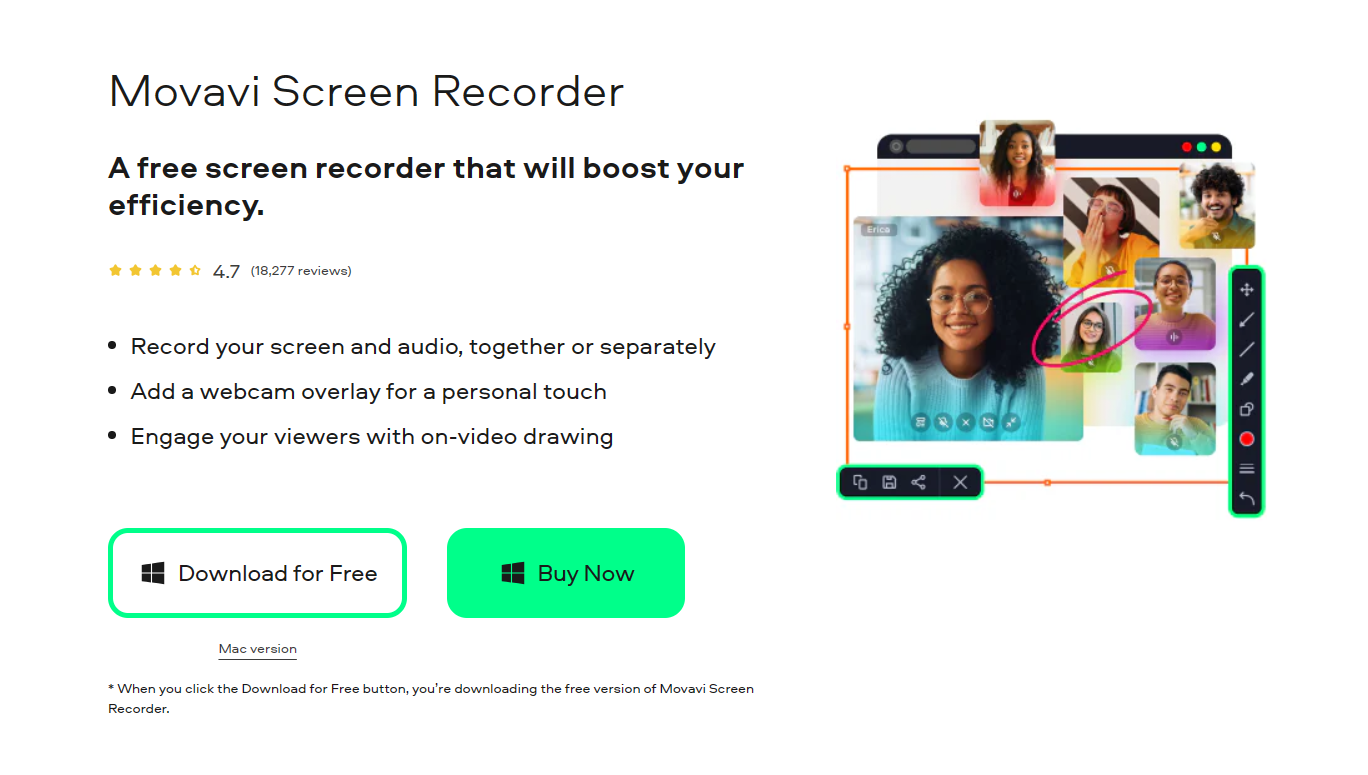
Movavi Screen Recorder is a powerful yet user-friendly tool designed to simplify the screen recording process for both beginners and experienced users. Its intuitive interface and rich feature set make it stand out among the myriad of screen capture software options available. With Movavi Screen Recorder, you can capture full-screen footage or select specific regions, record audio from your microphone and system, and even include webcam overlays for a more personalized touch.
Intuitive Interface for Smooth Navigation
Movavi Screen Recorder’s user-friendly interface ensures that you won’t be overwhelmed by complex settings. The straightforward design allows you to get started with recording in a few clicks, making it an excellent choice for anyone new to screen recording software.
Customizable Recording Options
Whether you want to capture your entire screen, a specific application window, or a selected region, Movavi has you covered. This level of customization allows you to focus on the content that matters most and produce high-quality videos without unnecessary distractions.
Capture High-Quality Audio

Audio is a crucial aspect of any video, and Movavi Screen Recorder understands that. With the ability to record both your microphone and system audio simultaneously, you can create engaging videos with crystal-clear sound and informative narration.
Scheduled Recording for Convenience
Are you worried about missing a live event or webinar? With Movavi’s scheduled recording feature, you can set a specific start time for your recording, ensuring that you never miss a moment, even if you can’t be present at your computer.
Cursor Effects for Clarity
To make your screen recordings more informative, Movavi Screen Recorder offers cursor effects such as highlighting and mouse click visualization. These features help your viewers follow your actions on the screen, making your videos more engaging and professional.
Noteworthy Features of Movavi Screen Recorder
- Flexible Recording Options: Movavi Screen Recorder offers various recording modes, allowing you to capture your entire screen or specific application windows. This flexibility ensures you only record what you want, saving you precious time during the editing process.
- Audio Capture: Adding narration or commentary to your screen recordings is essential for keeping your audience engaged. With Movavi Screen Recorder, you can record your voice through the microphone and system audio simultaneously, giving you full control over your audio settings.
- Scheduled Recording: Need to capture a live stream or webinar while you’re away from the computer? Movavi’s scheduled recording feature lets you set a start time for your recording session, ensuring you never miss a moment.
- Cursor Effects: Making it easier for your viewers to follow your actions on the screen is essential. Movavi Screen Recorder offers various cursor effects, such as highlighting, spotlighting, and mouse clicks, to add emphasis and clarity to your recordings.
- Video Editing: After recording your screen, you can easily trim, cut, and enhance your video using Movavi’s built-in editing tools. No need to invest in additional software—Movavi Screen Recorder has everything you need to create a polished final product.
- Visual Storytelling in Action: Screen recording software enables you to visually convey your message, making it an incredibly effective tool for storytelling. Whether you’re demonstrating a software tutorial, showcasing gameplay, or explaining complex concepts, screen recordings allow you to present information in a way that’s easy to understand and retain.
- Enhancing Collaboration: In the modern era of remote work and virtual collaboration, screen recording software plays a vital role in enhancing communication among team members. Whether you need to explain a process, provide feedback, or share important information, screen recordings can bridge the gap and facilitate smooth collaboration.
Step-by-Step Guide to Recording with Movavi Screen Recorder
Now that we have a good understanding of the software let’s dive into the step-by-step process of recording a video using Movavi Screen Recorder. Don’t worry; we’ll guide you through each stage, ensuring you can effortlessly create your screen recordings.
Step 1: Download and Install Movavi Screen Recorder
Before you can start recording, you’ll need to download and install Movavi Screen Recorder on your computer. Visit the official Movavi website (insert link here) and click on the download button. Once the download is complete, run the installation wizard and follow the on-screen instructions to set up the software.
Step 2: Launch Movavi Screen Recorder
After successful installation, launch Movavi Screen Recorder. You’ll be greeted with a user-friendly interface that presents various recording options. Take a moment to familiarize yourself with the layout and features.
Step 3: Configure Your Recording Settings
Before you start recording, ensure your settings are optimized for the best quality output. Click on the gear icon in the interface to access the settings menu. Here, you can adjust video resolution, frame rate, audio settings, and more. For instance, if you’re planning to record a high-definition tutorial, set the video resolution to 1080p and the frame rate to 60 fps for smooth playback.
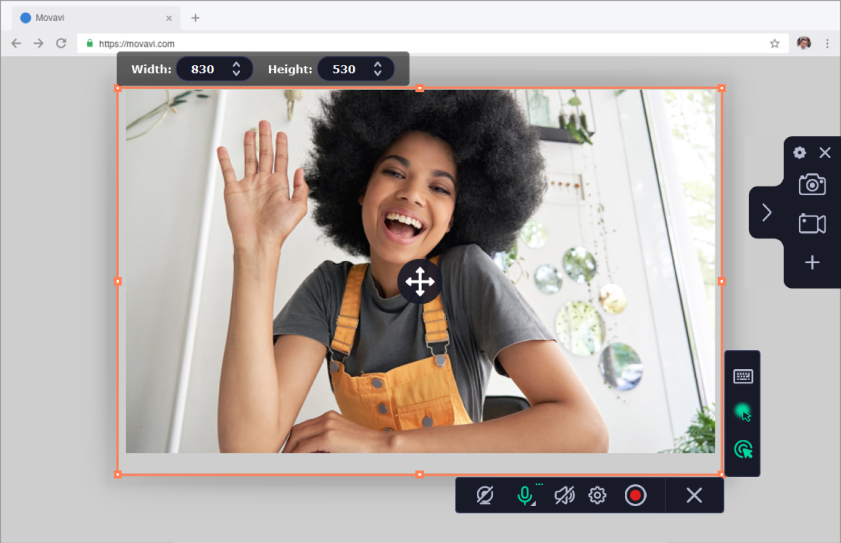
Step 4: Select Recording Area
Movavi Screen Recorder allows you to choose between recording your full screen or a specific region. To select a region, click on the “Capture Area” dropdown menu and choose “Custom.” Then, drag the crosshair cursor to define the area you want to record.
Step 5: Configure Audio and Webcam Settings
Depending on your recording requirements, you can enable or disable audio recording using the microphone and system audio icons. Additionally, if you want to include a webcam overlay in your video, click on the webcam icon and position the overlay to your liking.
Step 6: Begin Recording
With all your settings configured, you’re now ready to hit the big red “REC” button and start your recording. Take a deep breath, and don’t worry about any mistakes. You can always edit your video later!
Step 7: Add Annotations (Optional)
While recording, you have the option to add annotations, such as arrows, text, or highlights, to emphasize specific elements on your screen. This feature is particularly useful when explaining complex concepts or guiding your viewers through a tutorial.
Step 8: End the Recording
Once you’ve finished recording your video, click on the stop icon in the Movavi interface to end the recording session. Your screen recording will be automatically saved, and you can access it by clicking on the folder icon in the software.
Is Movavi Screen Recorder Good for Beginners?
- A User-Friendly Interface that Welcomes You. The first impression is crucial, especially when you’re just starting with new software. Movavi Screen Recorder’s user-friendly interface makes it a breeze for beginners to get started. With intuitive icons and straightforward navigation, you won’t find yourself lost in a sea of complex settings. Instead, you’ll be greeted by a friendly interface that welcomes you to the world of screen recording with open arms. Whether you want to record your full screen, a specific application window, or a custom region, Movavi has made sure that everything is within your reach.
- A Smooth Learning Curve: No Technical Jargon. Screen recording can be intimidating for beginners, especially with all the technical jargon flying around. But fear not! Movavi Screen Recorder is designed to ease you into the process without overwhelming you with complex terms. From adjusting video resolution to selecting audio sources, Movavi keeps it simple and straightforward. You’ll find that getting the hang of screen recording becomes a smooth and enjoyable experience.
- Flexibility for Your Needs. One size doesn’t fit all, and Movavi Screen Recorder understands that. The software offers a range of recording options to suit your specific needs. Whether you’re recording an engaging gaming session, creating a step-by-step tutorial, or capturing a video call with your loved ones, Movavi has got you covered. With the flexibility to record your full screen or specific regions, you can tailor your recordings to deliver the most impact.
Is Movavi Screen Recorder Good for Professionals?

- A Professional Tool for High-Quality Recordings. As a professional, your standards are high, and you need a screen recording software that can match those expectations. Movavi Screen Recorder offers a wealth of features that cater to professionals seeking top-notch recordings.
- Enhance Your Content with Editing Tools. As a professional, you understand the importance of delivering polished content that resonates with your audience. Movavi Screen Recorder’s built-in video editor provides essential editing tools to refine your recordings.
- Seamless Integration and File Formats. As a professional, you might be working with various software and platforms. Movavi Screen Recorder offers seamless integration with popular video-sharing platforms, enabling you to share your content with ease. Moreover, the software supports a wide range of file formats, giving you the flexibility to work with your preferred editing and post-production tools.
- Unleashing the Potential of Professionals. Movavi Screen Recorder isn’t just for beginners—it’s a powerful tool that empowers professionals to create captivating and professional content. Whether you’re an educator, marketer, trainer, or content creator, the versatility and features of Movavi Screen Recorder elevate your recordings to a whole new level. As a professional, your time is precious, and you need software that enhances your productivity. Movavi Screen Recorder’s intuitive interface and time-saving features allow you to focus on delivering top-notch content without being bogged down by complicated processes.
Conclusion
Congratulations! You’ve now mastered the art of recording a video using Movavi Screen Recorder. By following this step-by-step guide, you’ll be able to create captivating screen recordings for various purposes, from educational content to gaming highlights and software tutorials. Screen capture software like Movavi Screen Recorder empowers you to share your knowledge, experiences, and creative ideas with the world in a visually engaging manner.
Incorporating screen recordings into your content strategy can significantly enhance your online presence and captivate your audience. So, don’t hesitate to experiment with different recording techniques and explore the various features offered by Movavi Screen Recorder to take your videos to the next level.
Whether you’re a seasoned content creator or a beginner venturing into the world of video production, Movavi Screen Recorder provides a reliable and feature-rich solution to fulfill your recording needs. So go ahead, start recording, and let your creativity soar!

David’s journey in the tech world began as a system administrator and he has since transitioned to a new IT role in a different company. Over the years, his extensive knowledge and practical experience have made him a trusted go-to resource for friends and acquaintances seeking help with computer-related issues. Recognizing the value of his accumulated knowledge, David transformed his initial idea of a personal blog into a platform aimed at helping others.
He takes pride in crafting detailed and user-friendly articles and guides, ensuring that even novice computer users can benefit from his insights.
Send your message for David here and learn more about him.