

Tutorial videos are an invaluable resource for learning and sharing knowledge. Creating a tutorial video may come in handy if you want to teach a skill, demonstrate a process, or offer guidance on a specific topic. In this guide, we will explore the step-by-step process of how to make tutorial videos that are not only informative but also visually appealing and engaging.
Why Make Tutorial Videos?
Before diving into the nitty-gritty of creating tutorial videos, it’s essential to understand the importance and benefits of this medium. Tutorial videos offer several advantages that make them a popular choice for educators, content creators, and businesses alike:
1. Visual Learning:
Humans are visual creatures, and tutorial videos leverage this innate preference for visual learning. They provide a dynamic and engaging way to convey information, making it easier for viewers to grasp complex concepts or learn new skills.
2. Accessibility:
Tutorial videos can be accessed from anywhere with an internet connection, allowing you to reach a global audience. This accessibility makes them a powerful tool for sharing knowledge and expertise on a broad scale.
3. Increased Engagement:
Videos have higher engagement rates compared to text-based content. They captivate viewers’ attention, leading to longer watch times and better retention of information.
4. Versatility:
Tutorial videos can cover a wide range of topics and formats, from educational tutorials to product demonstrations, recipe guides, and more. This versatility allows you to tailor your content to your target audience.
5. Brand Building:
For businesses and content creators, tutorial videos offer an opportunity to establish authority and trust within your niche. Consistent, high-quality tutorial videos can help build your brand and attract a loyal following.
Now that we understand the importance of tutorial videos let’s delve into the step-by-step process of creating them.
Guide to Making a Tutorial Video

Step 1: Define Your Objective
Before you start making a tutorial video, it’s crucial to have a clear understanding of your objectives. Ask yourself the following questions:
- What is the main purpose of this tutorial video?
- Who is your target audience?
- What specific knowledge or skills do you want to convey?
- What action do you want your viewers to take after watching the video?
Having a well-defined objective will guide the content creation process and ensure that your video serves its intended purpose effectively.
Step 2: Choose Your Topic
Once you have a clear objective in mind, it’s time to choose a topic for your tutorial video. Consider your expertise and the interests of your target audience. Your topic should be relevant, valuable, and something you can explain with confidence.
Here are some tips for selecting a topic:
- Focus on your niche: Choose a topic related to your area of expertise or the theme of your channel or website.
- Address common pain points: Identify problems or challenges your audience faces and create a tutorial video that provides solutions.
- Research trending topics: Stay updated on current trends and create content that aligns with popular interests in your niche.
Step 3: Plan Your Content

Before you start recording, create a detailed outline or script for your tutorial video. This will serve as your roadmap during the production process. Your content plan should include:
- Introduction: Start with a compelling introduction that grabs viewers’ attention and provides an overview of what to expect.
- Main Content: Break down your tutorial into logical steps or sections. Clearly explain each point, and use visual aids like graphics, diagrams, or props to enhance understanding.
- Demonstrations: If your tutorial involves a hands-on process, demonstrate each step clearly and at a pace that is easy for viewers to follow.
- Call to Action: Conclude your video by summarizing key points and encouraging viewers to take action. This could be subscribing to your channel, visiting your website, or trying out the skills you’ve taught.
Step 4: Gather Your Equipment
Creating high-quality tutorial videos is essential to engage your audience and deliver effective content. While you don’t necessarily need a professional studio setup, investing in the right equipment can significantly enhance the overall quality of your videos. Here’s a closer look at each piece of equipment you should consider and some additional tips for choosing the best options:
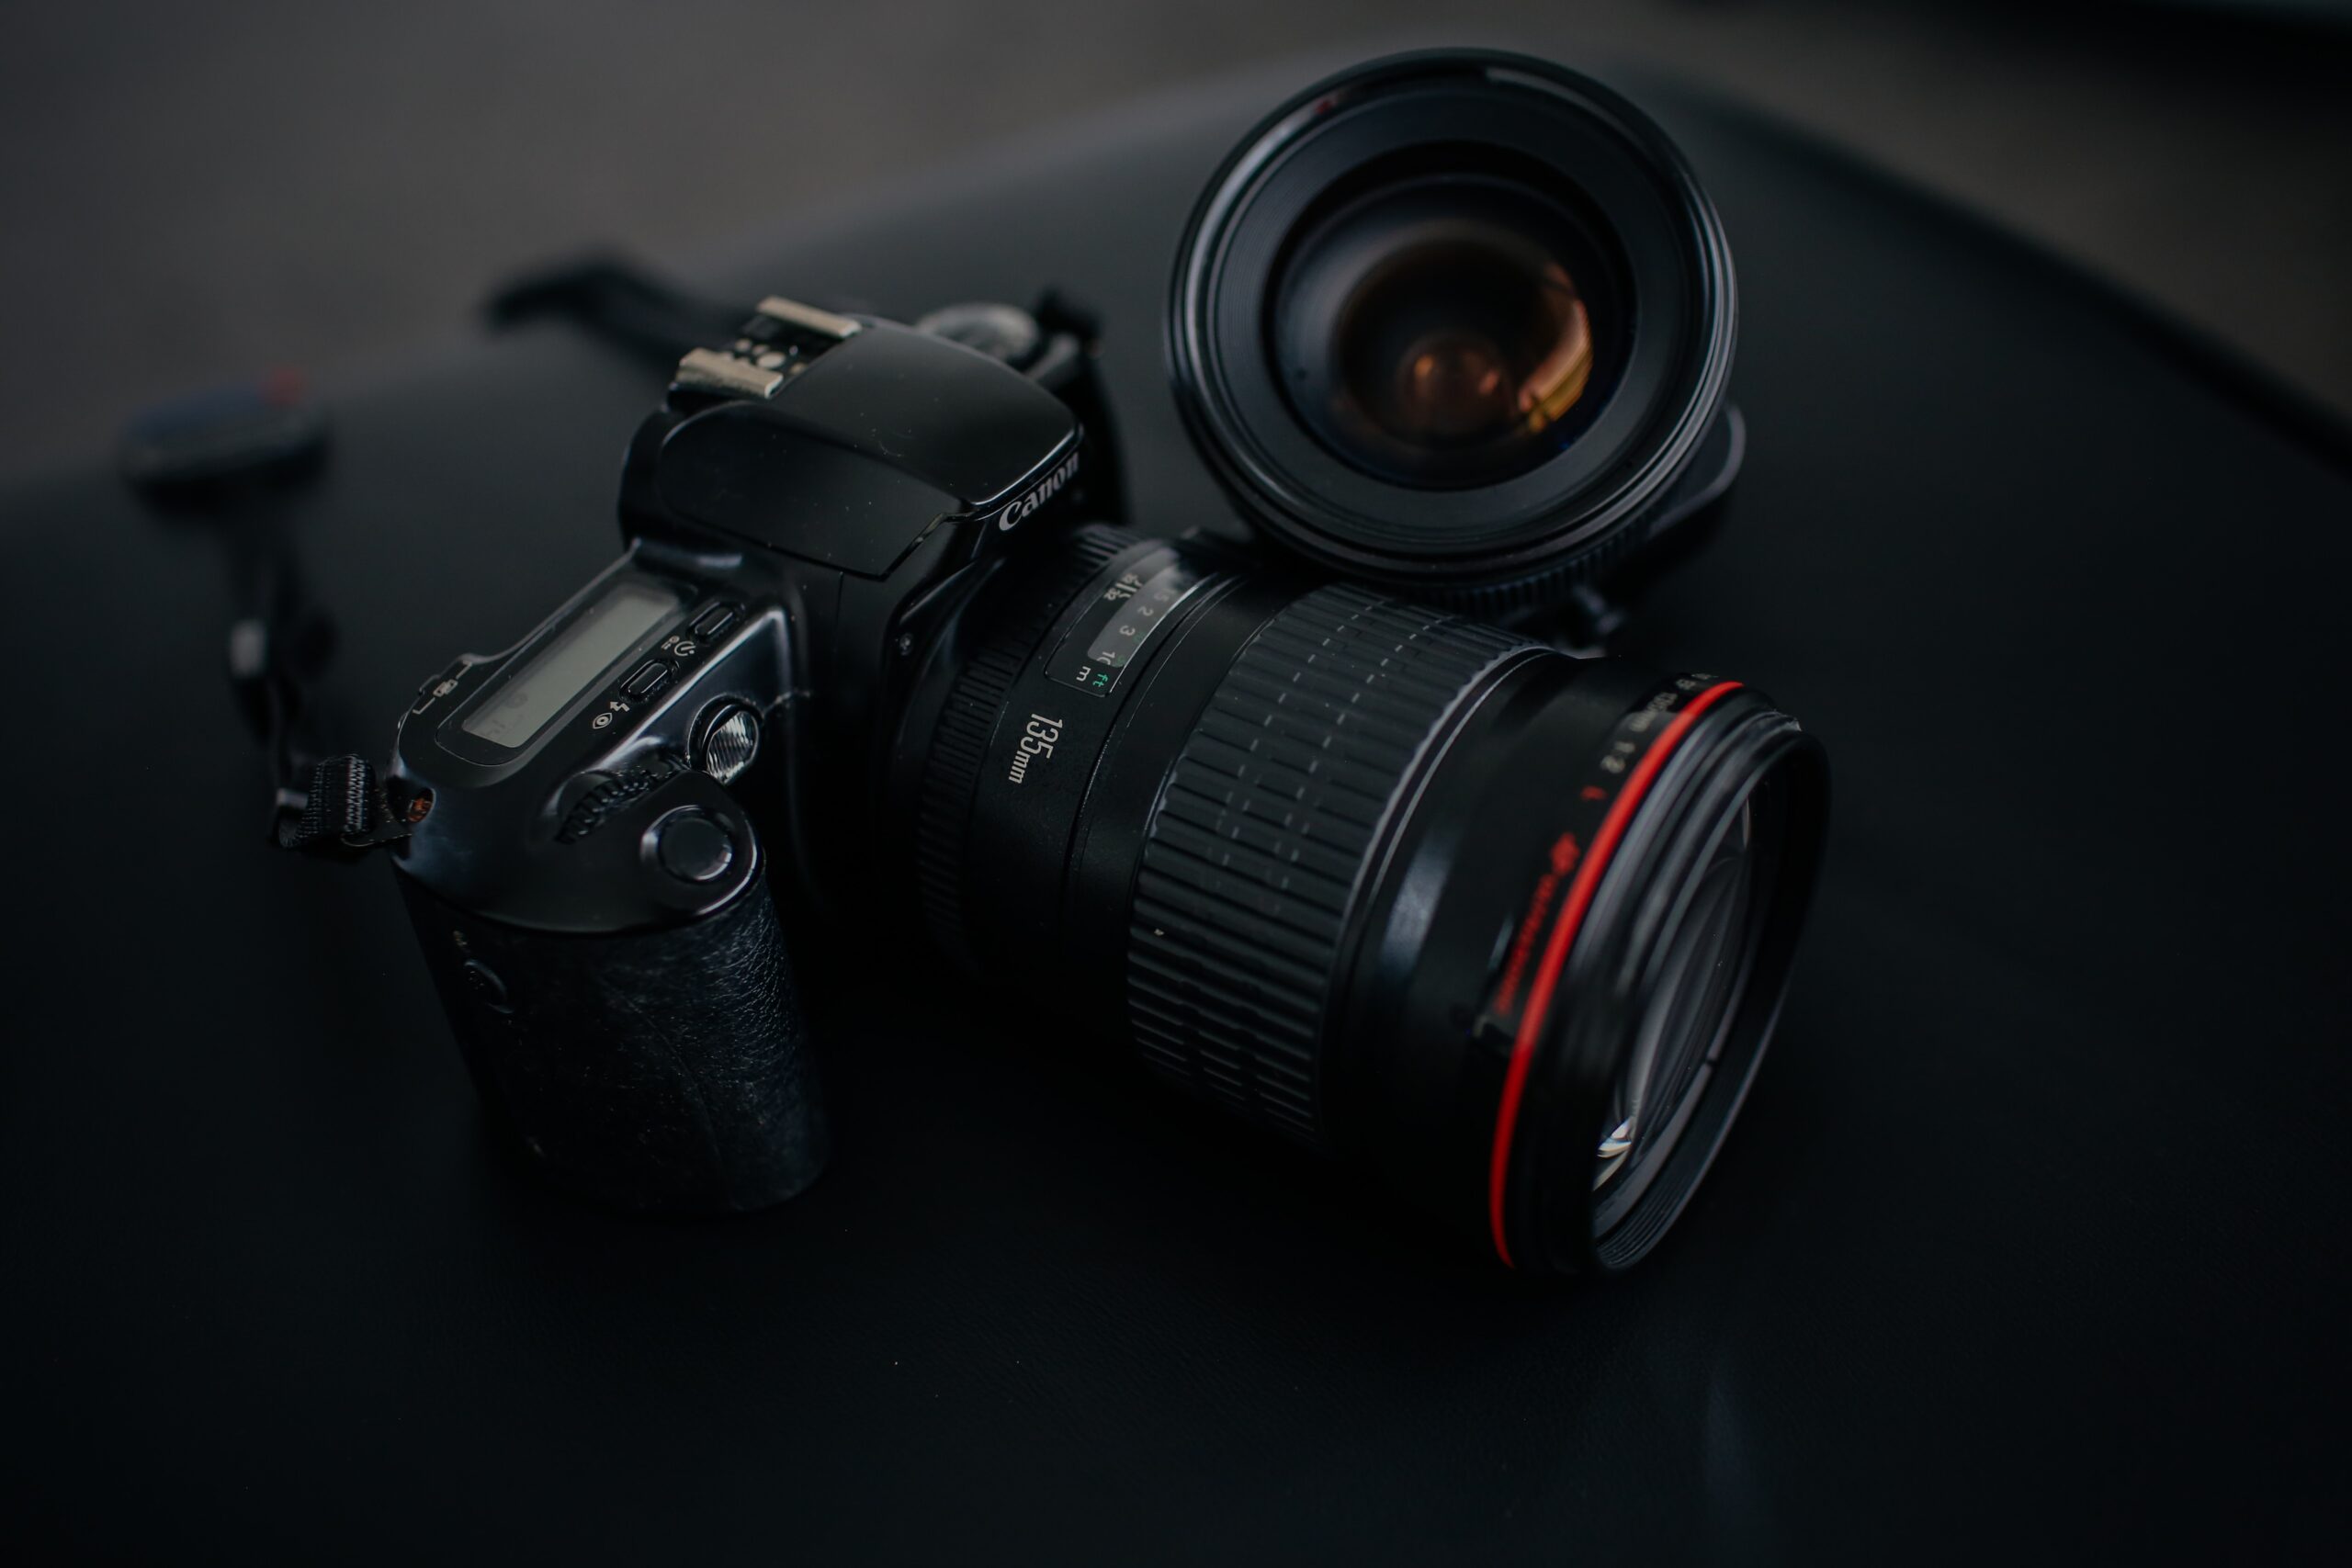
- Camera:
- Camera Type: Choose a camera that suits your budget and needs. DSLR cameras offer excellent image quality and versatility but can be more expensive. Alternatively, smartphones with high-resolution cameras can produce impressive results, especially for beginners.
- Resolution: Look for cameras or smartphones with at least 1080p resolution for crisp and clear video quality.
- Stabilization: Opt for a camera or smartphone with built-in image stabilization to reduce shaky footage.
- Microphone:
- External Microphone: Invest in an external microphone for superior audio quality. There are various types available, including lavalier (clip-on) microphones, shotgun microphones, and USB microphones.
- Directionality: Choose a microphone that suits your recording environment. Shotgun microphones are excellent for isolating sound sources, while lavalier microphones are great for hands-free recording.
- Wind Protection: If you plan to record outdoors or in windy conditions, consider getting a windscreen or foam cover to minimize wind noise.
- Lighting:
- Natural Light: Whenever possible, utilize natural light as it can provide soft and flattering illumination. Position yourself facing a window or use diffusers to soften harsh sunlight.
- Softbox Lights: If natural light is insufficient, invest in softbox lights. These are affordable and create even, diffused lighting that reduces shadows and enhances video quality.
- Color Temperature: Pay attention to the color temperature of your lighting. Daylight-balanced (around 5500K) lights are ideal for achieving a natural look.
- Tripod:
- Sturdy Build: Select a tripod that can securely hold your camera or smartphone without wobbling. Ensure it is adjustable to your desired height.
- Portability: If you plan to shoot in various locations, consider a lightweight and portable tripod for easy transport.
- Tilt and Pan Head: Opt for a tripod with a tilt and pan head for smooth camera movements and adjustments.
- Editing Software:
- Compatibility: Choose video editing software that is compatible with your operating system. Adobe Premiere Pro and Final Cut Pro are popular choices for professionals, but free options like DaVinci Resolve and HitFilm Express are excellent for beginners.
- Learning Curve: Consider your level of expertise when selecting software. Some programs may have steeper learning curves, so choose one that aligns with your skill level.
- Features: Look for software with the features you need, such as video trimming, color correction, text overlays, and audio editing capabilities.
- Green Screen (Optional):
- Background Flexibility: If you plan to change your video’s background or create a seamless backdrop, invest in a green screen.
- Size: Choose a green screen that matches the dimensions of your shooting area to ensure consistent results.
- Lighting Considerations: Properly illuminate your green screen to avoid shadows and achieve a clean chroma key effect during post-production.

- External Recorder (Optional):
- Audio Quality: If audio quality is paramount, consider an external audio recorder. This allows you to record audio separately and sync it in post-production for optimal clarity.
- Portability: Select a recorder that suits your recording environment. Some recorders are portable and suitable for on-the-go recording.
Step 5: Set Up Your Recording Space
Your recording environment plays a crucial role in the overall quality of your tutorial video. Here are some tips for setting up your recording space:
- Choose a quiet location: Minimize background noise as much as possible. A quiet room or a dedicated recording space is ideal.
- Background: Ensure your background is clean, uncluttered, and relevant to your topic. You can use a plain backdrop or create a visually appealing setting.
- Lighting: Position your lights to eliminate shadows and evenly illuminate your recording area.
- Framing: Use the “rule of thirds” to frame yourself or your subject. This means dividing the frame into thirds both horizontally and vertically and positioning your subject along these lines.
Step 6: Record Your Video
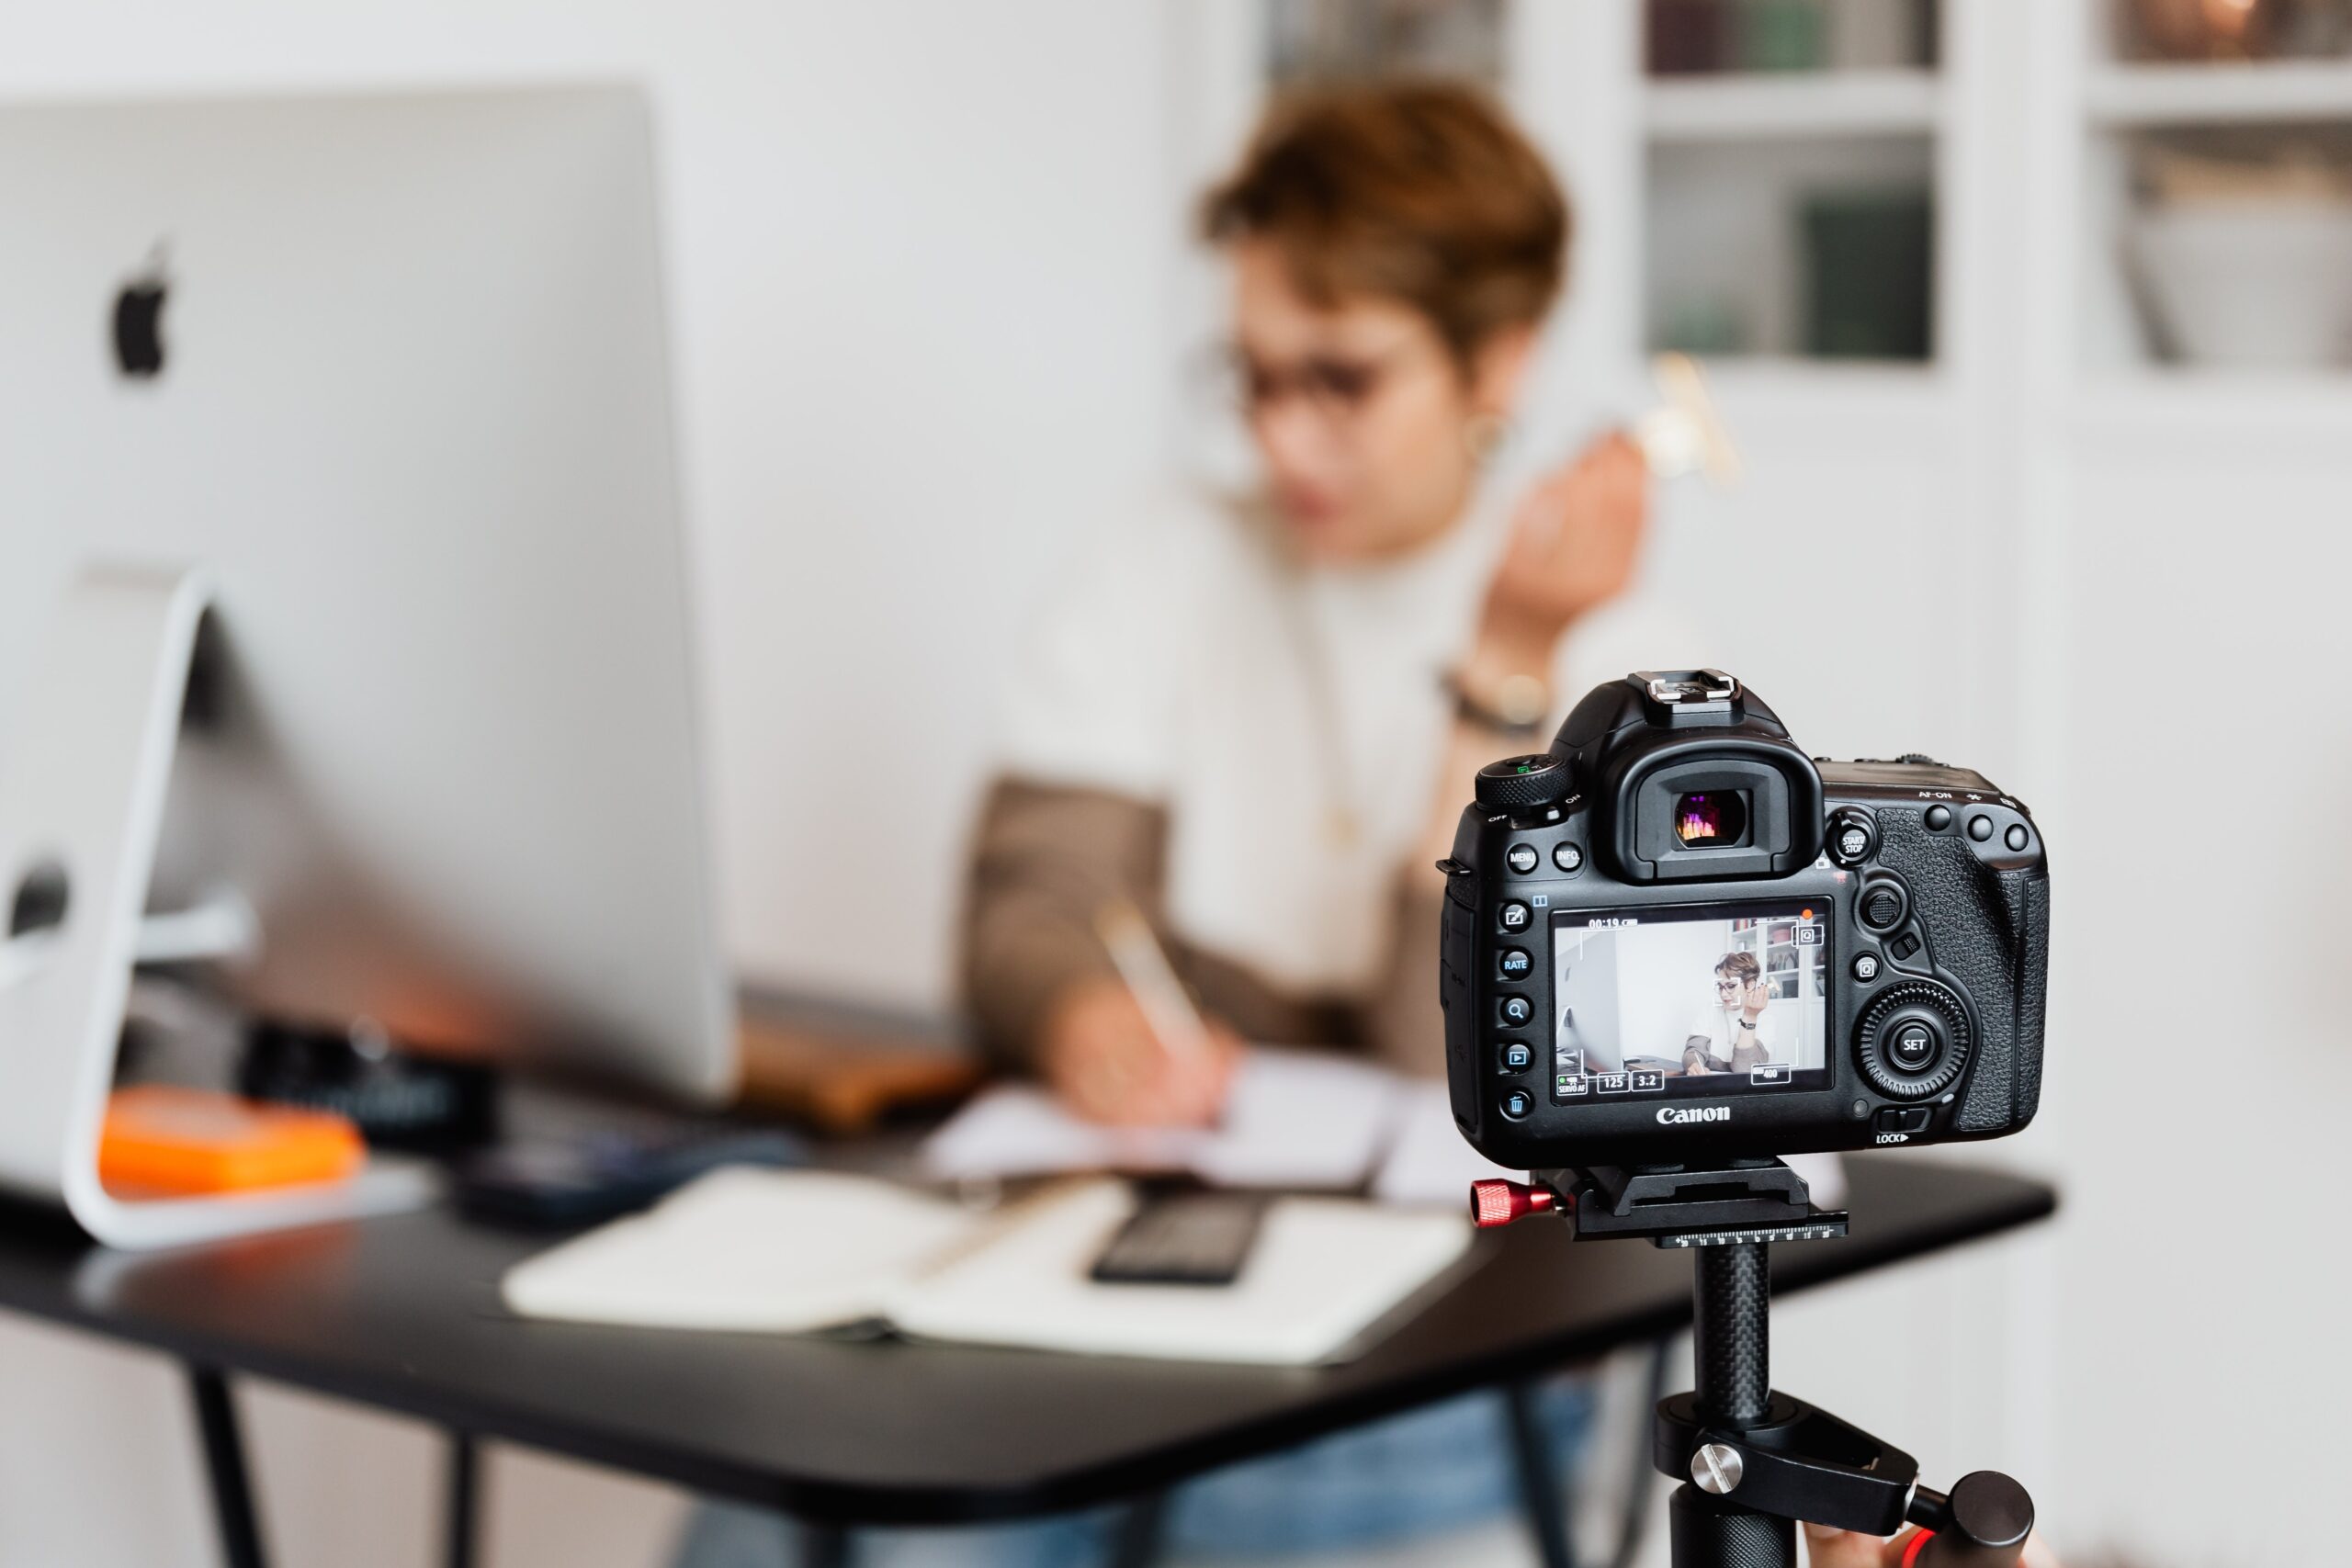
Now it’s time to start recording your tutorial video. Follow these best practices to ensure a smooth recording process:
- Use a script or outline: Refer to your content plan to stay on track and cover all the necessary points.
- Speak clearly: Enunciate your words and maintain a steady pace. Avoid speaking too quickly or too slowly.
- Maintain eye contact: If you’re addressing the camera directly, make eye contact with your viewers to establish a connection.
- Be natural and enthusiastic: Let your personality shine through. Viewers appreciate authenticity and enthusiasm.
- Record multiple takes: Don’t worry if you make mistakes; you can edit them out later. It’s common to record multiple takes to ensure you have the best footage to work with.
Step 7: Edit Your Video
Video editing is the stage where your tutorial video transforms from raw footage into a polished and engaging masterpiece. To achieve this, you’ll need video editing software and a creative touch. Here are essential video editing tips and techniques to make your tutorial video stand out:
- Trim and Cut with Precision:
- Carefully review your footage and remove any unnecessary or redundant clips. Trim your video to maintain a concise and focused narrative.
- Pay attention to pacing; avoid long pauses or excessive repetition.
- Seamless Transitions:
- Add smooth transitions between scenes to improve the flow of your video. Common transitions include fades, dissolves, and wipes.
- Avoid overusing transitions, as they can distract from the content.
- Audio Enhancement:
- Ensure clear and crisp audio by removing background noise, hums, or audio glitches. Use audio editing tools to fine-tune the sound quality.
- Adjust audio levels to maintain a balanced sound throughout the video.
- Add background music or sound effects if they enhance the viewer’s experience, but ensure they don’t overpower the narration or main audio.
- Text Overlays and Graphics:
- Incorporate text overlays to reinforce key points, emphasize important information, or provide context.
- Use graphics and animations to illustrate complex ideas or add visual interest.
- Keep text and graphics legible and unobtrusive, and use consistent fonts and styles for a professional look.
- Color and Lighting Correction:
- Correct color and lighting issues to ensure visual consistency. Adjust brightness, contrast, and color saturation as needed.
- Apply color grading or filters to achieve a specific mood or style, but maintain a natural look unless artistic intent dictates otherwise.
- Use color correction tools to match footage from different sources for a cohesive look.
- Visual Effects and Transitions:
- Experiment with visual effects and transitions to add creativity and engagement to your video.
- Be cautious not to overwhelm your video with excessive effects; use them sparingly to enhance storytelling.
- Crop and Zoom:
- Crop or zoom in on specific parts of your video to emphasize details or highlight specific content.
- Use these techniques to guide the viewer’s attention and enhance the visual storytelling.
- Consistency in Branding:
- If you have a brand or logo, incorporate it consistently throughout your video to reinforce your identity.
- Maintain a consistent style, color palette, and overall aesthetic to enhance brand recognition.
- Test and Review:
- After editing, watch your video multiple times to catch any errors, glitches, or inconsistencies.
- Seek feedback from others, especially if they are part of your target audience, to ensure your video effectively conveys its message.
- Export and Optimize: – When exporting your video, choose the appropriate settings to maintain high quality while ensuring compatibility with your chosen platform. – Consider creating multiple versions for different platforms and resolutions if necessary.
Step 8: Add Value with Visuals
One of the strengths of tutorial videos is their ability to convey information visually. Make the most of this by incorporating various visual elements:
- Graphics and Text: Use on-screen graphics and text to highlight key points, instructions, or important details.
- Screen Recording: If your tutorial involves software or digital processes, record your screen to show exactly what you’re doing.
- Illustrations and Diagrams: Create or use visual aids like illustrations or diagrams to simplify complex concepts.
- B-Roll Footage: Incorporate supplementary footage or images to add depth and context to your tutorial.
Step 9: Polish Your Presentation
Before finalizing your tutorial video, review it for clarity, coherence, and engagement:
- Check for errors: Ensure there are no factual errors or inconsistencies in your content.
- Test pacing: Make sure your video flows smoothly, with no sections that feel rushed or overly long.
- Seek feedback: Show your video to a trusted friend or colleague to get constructive feedback.
Step 10: Optimize for SEO
If you’re publishing your tutorial video on platforms like YouTube, optimizing for search engines (SEO) is essential. Here are some SEO tips for your video:
- Use a descriptive title with your target keyword (“How to Make Tutorial Videos”).
- Write a detailed video description that includes relevant keywords.
- Add relevant tags and categories.
- Create an eye-catching thumbnail image.
- Encourage likes, comments, and shares to improve visibility.
Step 11: Publish and Promote
Once your tutorial video is ready, it’s time to publish it and promote it to your target audience:
- Choose the right platform: Decide where you’ll publish your video, whether it’s YouTube, Vimeo, your website, or a social media platform.
- Write an engaging video title and description: Use compelling language and keywords to attract viewers.
- Share on social media: Promote your video across your social media channels and relevant online communities.
- Engage with your audience: Respond to comments and interact with viewers to build a community around your content.
Step 12: Analyze and Improve
After your tutorial video is live, monitor its performance using analytics tools provided by the hosting platform. Pay attention to metrics like views, watch time, and audience retention. Use this data to refine your future videos and better meet the needs of your audience.
Types of Tutorial Videos
Tutorial videos are a versatile medium for sharing knowledge and expertise on a wide range of topics. Depending on your goals and the subject matter you want to cover, there are various types of tutorial videos you can create. Each type serves a specific purpose and caters to different learning preferences and audience needs. Here are some of the most common types of tutorial videos:
How-To Videos:
- These videos provide step-by-step instructions on how to perform a specific task or accomplish a particular goal.
- Examples: “How to Tie a Tie,” “How to Bake Chocolate Chip Cookies,” “How to Create a Budget in Excel.”
Educational Tutorials:
- Educational tutorials cover academic subjects or complex topics in a structured and informative manner.
- Examples: “Introduction to Calculus,” “History of Ancient Rome,” “Understanding Quantum Physics.”
Software and Technology Guides:
- These tutorials explain how to use software applications, gadgets, or technology tools effectively.
- Examples: “Photoshop Basics for Beginners,” “Setting Up Your Home Network,” “Mastering Microsoft Excel.”
DIY and Craft Tutorials:
- DIY (Do It Yourself) and craft tutorials offer creative and hands-on instructions for making or building things.
- Examples: “DIY Home Décor Ideas,” “Knitting a Scarf,” “Building a Birdhouse.”
Product Demonstrations:
- Product demonstration videos showcase the features and benefits of a specific product or service.
- Examples: “Unboxing and Review of the Latest Smartphone,” “Demonstration of a Kitchen Appliance,” “Showcasing a Fitness App.”
Cooking and Recipe Videos:
- Cooking tutorials guide viewers through the preparation of delicious recipes, offering cooking tips and techniques.
- Examples: “Easy Weeknight Dinner Recipes,” “Baking a Perfect Birthday Cake,” “Grilling Techniques for BBQ Lovers.”
Fitness and Exercise Tutorials:
- These videos provide workout routines, fitness tips, and exercises to help viewers stay healthy and active.
- Examples: “Full-Body HIIT Workout,” “Yoga for Stress Relief,” “Strength Training for Beginners.”
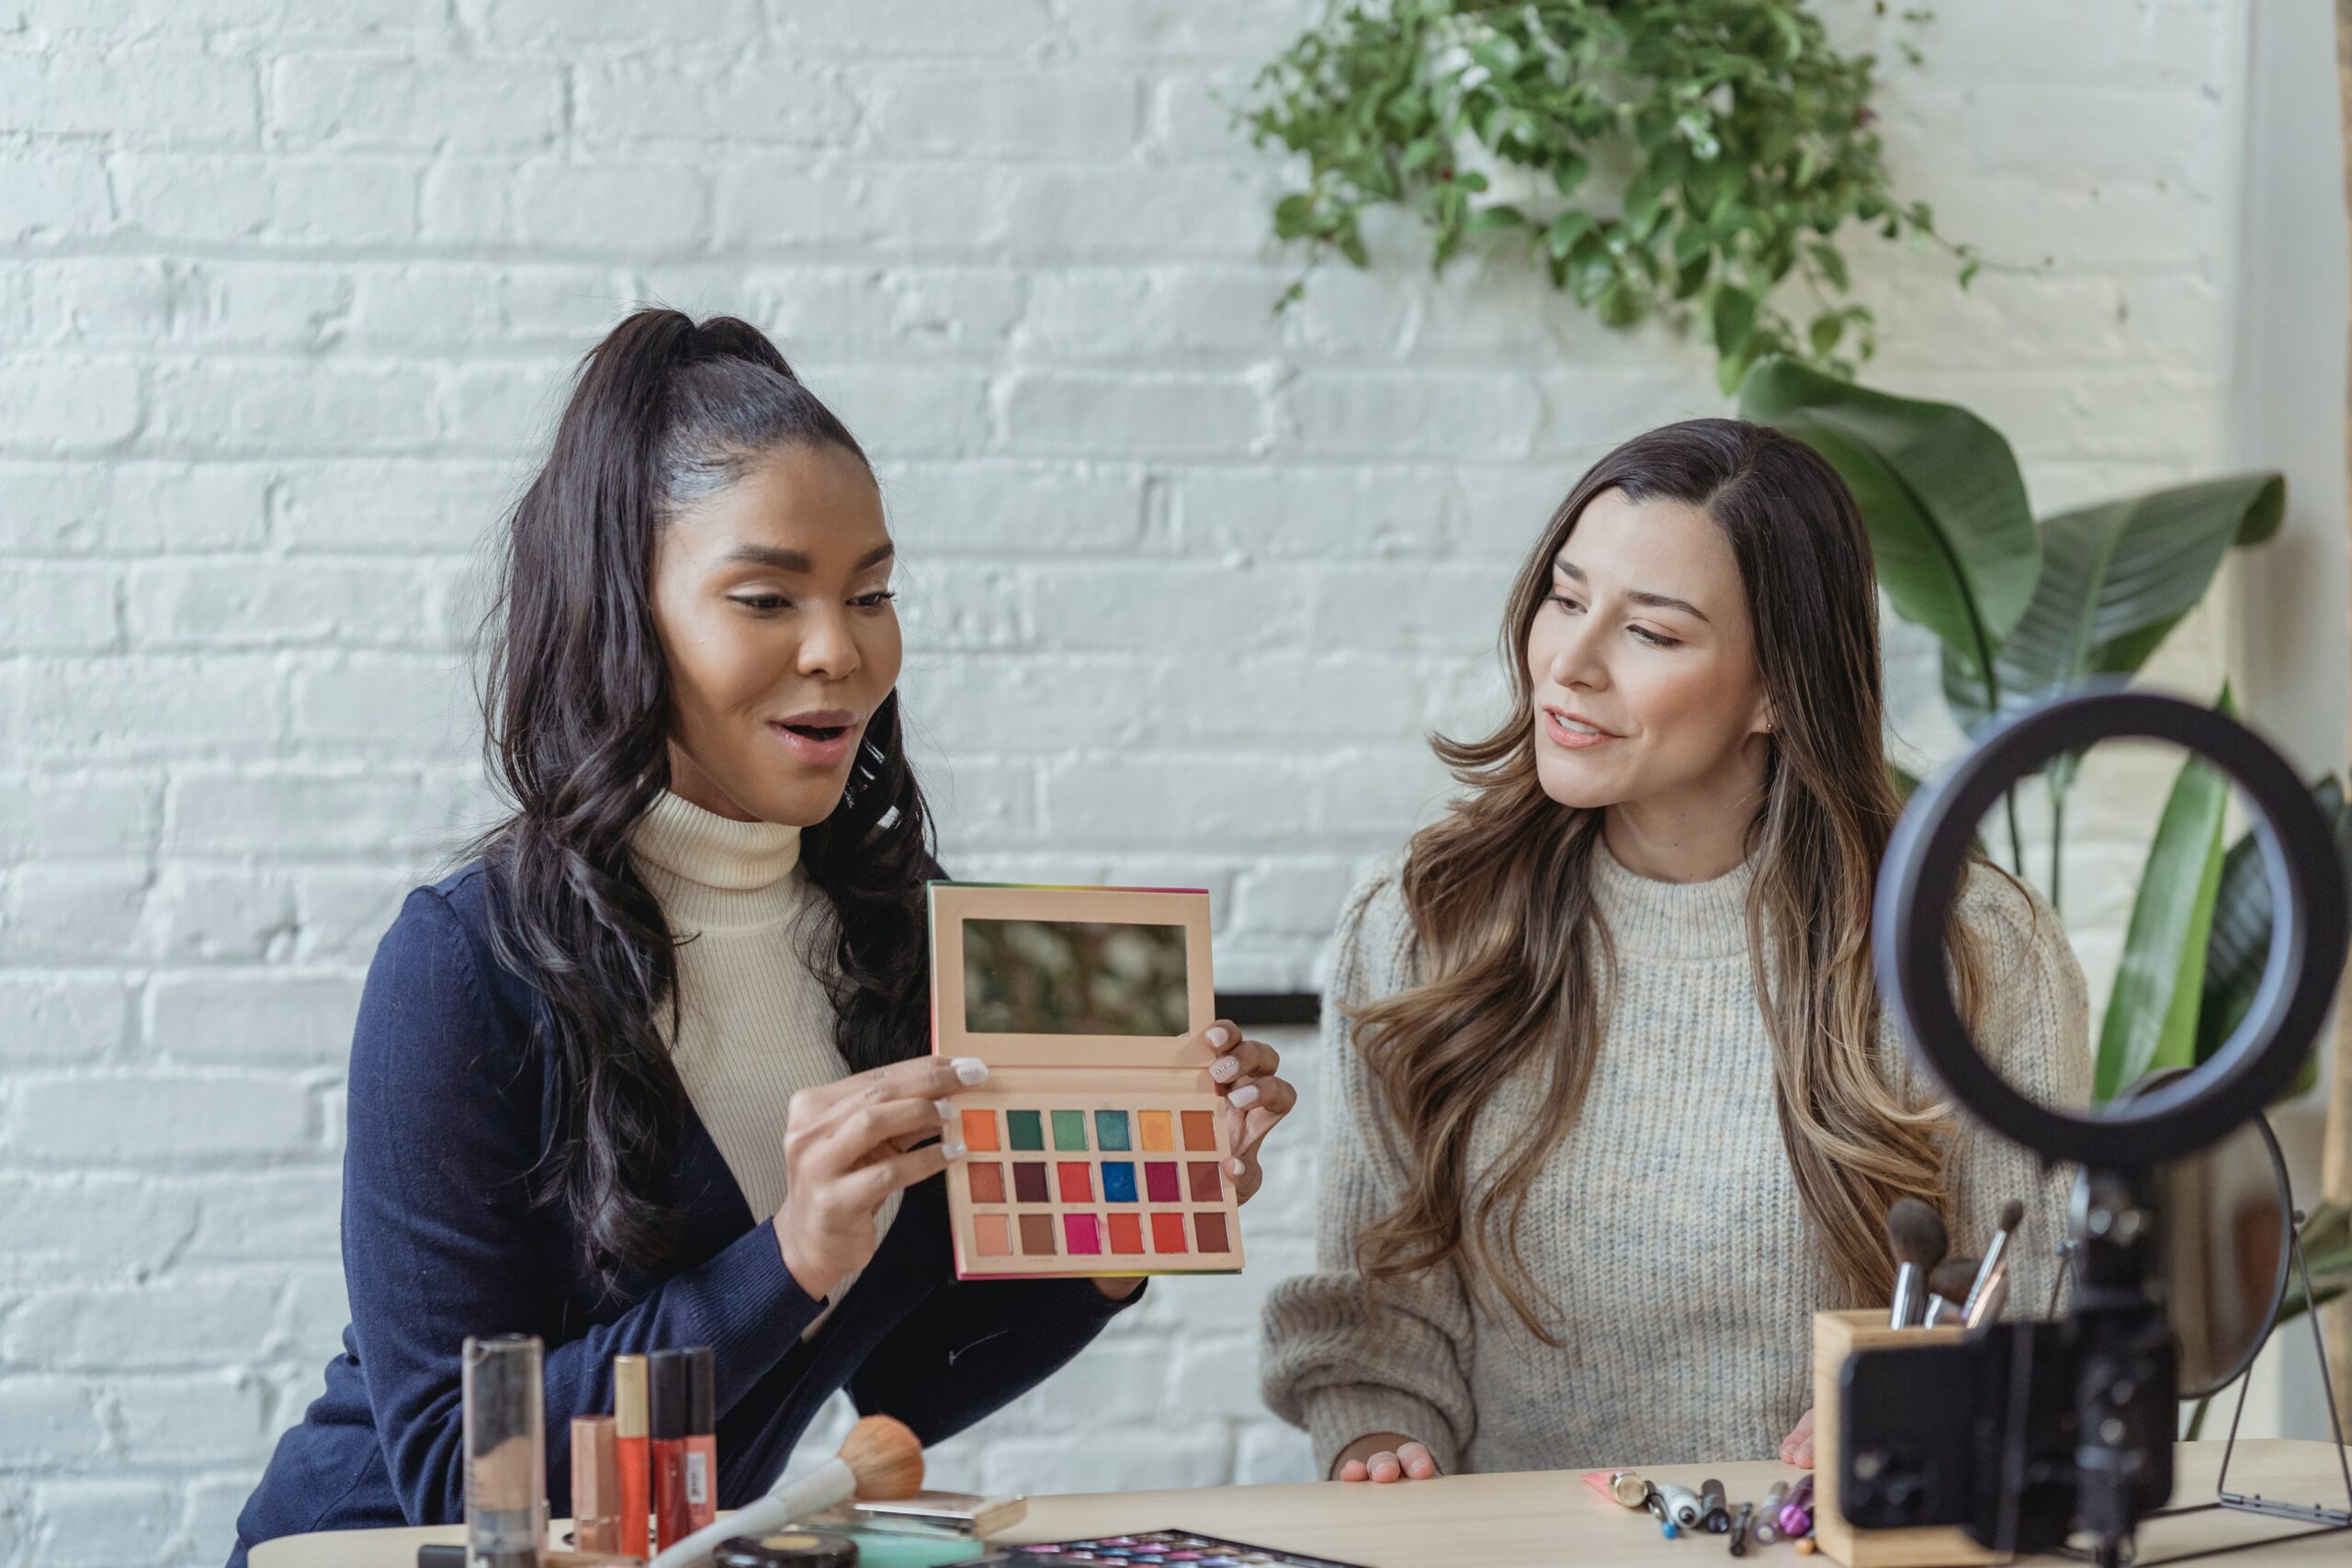
Beauty and Makeup Tutorials:
- Beauty tutorials offer makeup tips, skincare routines, and hairstyling techniques to enhance one’s appearance.
- Examples: “Everyday Makeup Look,” “Creating the Perfect Smokey Eye,” “How to Style Different Hair Types.”
Language and Communication Skills:
- Language tutorials help learners improve their language skills, pronunciation, and communication abilities.
- Examples: “Learn Spanish for Beginners,” “Effective Public Speaking Tips,” “Mastering Business English.”
Gaming and Game Walkthroughs:
- Gaming tutorials provide tips, strategies, and walkthroughs for video games, helping players improve their skills.
- Examples: “Beginner’s Guide to Minecraft,” “Boss Fight Walkthrough in Dark Souls,” “Tips for Winning in Fortnite.”
Travel and Adventure Guides:
- Travel tutorials offer advice on planning trips, exploring destinations, and experiencing new cultures.
- Examples: “Backpacking Through Southeast Asia,” “Solo Travel Tips for Women,” “Exploring the Wonders of Europe.”
Life Hacks and Tips:
- Life hack videos share practical and time-saving tips for various aspects of everyday life.
- Examples: “Organizing Your Closet Like a Pro,” “Budget-Friendly Home Cleaning Hacks,” “Healthy Living Tips.”
Review and Comparison Videos:
- Review tutorials provide in-depth evaluations and comparisons of products, services, or experiences.
- Examples: “Smartphone Comparison: iPhone vs. Android,” “Restaurant Review: Best Pizza Places in Town,” “Car Buying Guide.”
Art and Creative Skill Tutorials:
- These tutorials focus on developing artistic and creative skills, such as drawing, painting, and music composition.
- Examples: “Watercolor Painting Techniques,” “Learning to Play the Guitar,” “Digital Art with Adobe Illustrator.”
Personal Development and Self-Improvement:
- Personal development tutorials offer guidance on self-improvement, motivation, and achieving personal goals.
- Examples: “Building Confidence and Self-Esteem,” “Mindfulness Meditation for Stress Relief,” “Time Management Tips.”
Conclusion
Creating tutorial videos is a rewarding endeavor that allows you to share your knowledge, connect with your audience, and build a brand. By following the steps outlined in this comprehensive guide, you can create tutorial videos that are informative, engaging, and visually appealing. Remember that practice makes perfect, so keep refining your skills and exploring new ways to deliver valuable content through video. Whether you’re a teacher, content creator, or business owner, tutorial videos are a powerful tool that can help you educate, inspire, and connect with your audience in today’s digital world.
Frequently Asked Questions
1. What equipment do I need to make tutorial videos?
To create high-quality tutorial videos, you’ll need essential equipment, including a camera (DSLR or smartphone), an external microphone, proper lighting, a tripod, and video editing software. Additional equipment such as a green screen or external audio recorder can be optional, depending on your specific needs and goals.
2. What camera should I use for tutorial videos?
The choice of camera depends on your budget and preferences. A DSLR camera offers excellent image quality and versatility but can be more expensive. Alternatively, modern smartphones often have high-resolution cameras that produce impressive results, making them a viable option, especially for beginners.
3. How do I ensure good audio quality in my tutorial videos?
Clear and crisp audio is crucial for tutorial videos. To achieve good audio quality, invest in an external microphone that suits your recording environment. Consider the microphone’s directionality, use a windscreen or foam cover to reduce wind noise, and always monitor audio levels during recording to avoid clipping or distortion.
4. What are some tips for effective lighting in tutorial videos?
Proper lighting is essential for visual appeal. Utilize natural light whenever possible by positioning yourself facing a window or using diffusers to soften harsh sunlight. If natural light is insufficient, invest in softbox lights to create even, diffused lighting that reduces shadows and enhances video quality. Pay attention to the color temperature of your lighting, aiming for daylight-balanced lights (around 5500K) for a natural look.
5. How do I choose the right video editing software?
Choosing video editing software depends on your specific needs and skill level. Popular options for beginners include DaVinci Resolve and HitFilm Express, both of which offer powerful features for free. For more advanced users, Adobe Premiere Pro and Final Cut Pro are industry-standard choices. Consider factors like compatibility with your operating system, the learning curve, and the availability of features when making your selection.
6. Are there any best practices for trimming and cutting footage during video editing?
When trimming and cutting footage, focus on maintaining a concise and focused narrative. Avoid long pauses, redundant content, or unnecessary tangents. Ensure that the pacing of your video feels natural and engaging, as this will help retain viewers’ attention.
7. How can I effectively use transitions between scenes?
Transitions between scenes can improve the flow of your video. Use them to create smooth visual transitions and avoid abrupt cuts. Common transition options include fades, dissolves, and wipes. However, it’s essential to use transitions sparingly to prevent them from becoming distracting.
8. What are some best practices for incorporating text overlays and graphics?
Text overlays and graphics should enhance your tutorial video’s clarity. Keep them legible and unobtrusive, using consistent fonts and styles. Use graphics and animations to illustrate complex ideas or add visual interest, but ensure they support the content rather than detract from it.
9. How can I correct color and lighting issues during video editing?
Correcting color and lighting issues is essential for visual consistency. Adjust brightness, contrast, and color saturation as needed to improve video quality. Color grading or filters can be used to achieve a specific mood or style, but always aim for a natural look unless artistic intent dictates otherwise. Color correction tools can also help match footage from different sources for a cohesive look.
10. What is the significance of maintaining consistency in branding?
Consistency in branding is crucial for building brand recognition. Incorporate your brand’s logo or identity elements consistently throughout your video. This reinforces your identity and helps viewers associate your content with your brand. Additionally, maintaining a consistent style, color palette, and overall aesthetic enhances the professional look of your videos.
11. How can I optimize my video for different platforms?
When exporting your video, choose settings that maintain high quality while ensuring compatibility with your chosen platform. Different platforms may have specific requirements for video resolution and format, so be sure to research and adhere to their guidelines. Consider creating multiple versions of your video for various platforms and resolutions if necessary.
12. How do I keep my tutorial videos engaging and informative?
To keep your tutorial videos engaging and informative, focus on clear and concise explanations. Use a conversational tone to connect with your audience. Incorporate real-world examples and practical demonstrations to illustrate your points. Additionally, pay attention to viewer feedback and continuously improve your content based on their needs and preferences.

David’s journey in the tech world began as a system administrator and he has since transitioned to a new IT role in a different company. Over the years, his extensive knowledge and practical experience have made him a trusted go-to resource for friends and acquaintances seeking help with computer-related issues. Recognizing the value of his accumulated knowledge, David transformed his initial idea of a personal blog into a platform aimed at helping others.
He takes pride in crafting detailed and user-friendly articles and guides, ensuring that even novice computer users can benefit from his insights.
Send your message for David here and learn more about him.